DIY: Easy No-Drill-Bit Mason Jar Soap Dispenser

I have been wanting to do this DIY for a while now, but every time I googled the directions, I got flustered by the whole “need a drill bit” instruction. C’mon now. Like I always maintain, power drills and DIYs do not mix well for me. Now, I did have to sacrifice some quality for my stubborn method, but it was easier, and it works. My hands are clean!

You can choose to paint your mason jar – if you do I recommend spray paint, it goes on smoother on glass jars – but I chose to keep mine clear to monitor soap level!

Materials

  1. Mason Jar with non-glass lid!
  2. Soap pump – I recycled mine from a soap dispenser I bought at Dollarama
  3. Scissors
  4. Super glue *optional
  5. Straw *optional
  6. Soap *not so optional

Instructions

  1. Clean mason jar if dirty
  2. Cut a hole in the lid (I used scissors to poke the initial hole, then twisted the scissor blade to make it larger and rounder). The hole should be as big as the width of the soap dispenser tube.
  3. Make sure soap dispenser tube fits into the mason jar, if its too long, trim the tube, make sure it isn’t too short though!
  4. Fill mason jar with soap – best part of this? you can buy those litres of refill soap vs. the more costly individual bottles
  5. Screw lid back on, insert tube! Now if its not very sturdy, you can super glue the pump to the lid.
  6. Tie straw around bottle.
  7. Pump, pump!

Take that, drill bit.


DIY: The Great Thread Clean Up


Is there anything worse than a disorganized crafting drawer? Shelf? Room? No. Its the worst. And so uninspiring!

When everything is where it should be, organized and labeled, you feel like the DIY Queen/King that you are.

And, while you’re tackling that annoying-but-satisfying-at-the-end drawer/shelf/room clean up job — Why not craft as well?

2 birds with 1 stone my friends.

Materials 

All purchased for $1 at Dollarama:

  1. Clothes pins
  2. Glitter
  3. Acrylic paint, any colour, or plain white glue
  4. Thread
  5. Newspaper — just to cover your working space

Instructions

  1. Cover a clothes pin in glue or paint –  if you use paint you have to move a bit faster to step #2 as paint dries quicker than glue, and is less sticky
  2. Sprinkle with a little or a lot of glitter!
  3. Let dry
  4. Place beginning of thread into clothes pin clasp, spin the thread around and around till you reach the end, reinsert end into clasp

Perfect lazy Sunday but-I-did-something-productive craft.

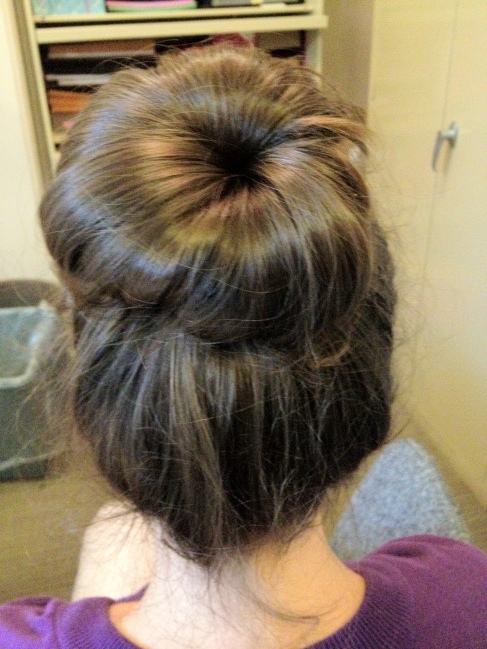
DIY: Sock Bun

Image

You know whats impossible for me? Finding the energy at night to wash AND dry my hair. And when I don’t blowdry, I have the worst rat’s nest like hair.

Solution? The sock bun

Materials

  1. Scissors
  2. Brush
  3. 1 sock (I know you have those random socks that have no partner)
  4. Hair tie
  5. Bobby pins

Instructions

  1. Cut the so that you only have the tube that covers your ankle/calf
  2. roll the sock from the cut end to the other end, making a donut
  3. Brush your hair and put it in a high pony tail
  4. Pull your ponytail through the donut
  5. Roll the donut down towards your head, tucking hair underneath as you go. IT LOOKS WRONG, but trust me, you’re doing it right.
  6. Secure with bobby pins 🙂

Lovely 🙂 And so much better than that rat’s nest you were just sporting.

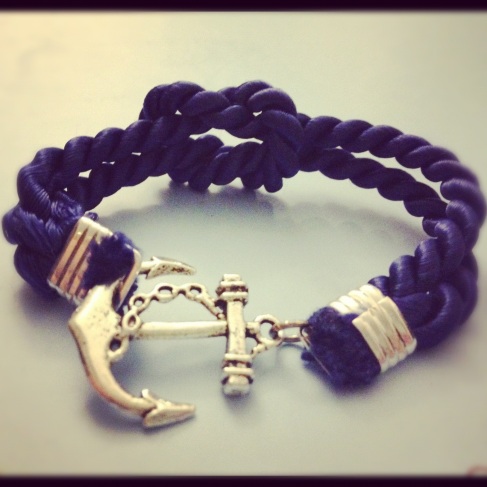
DIY: Jewelry that Anchors Me NEW AND WAYYY IMPROVED!

Image

Hey guys,

As promised – I redid my bracelet, and this time used all the correct materials AND then some…But it was way easier. I am actually so horrified by my last attempt that I am moving that post to DIY: FAILS.

Materials

  1. Anchor charm – Art On – 70 CENTS!
  2. Rope – Any craft store, $1 for 1 foot
  3. LARGE crimping beads. Its important you find ones that have a hook to attach beads or clasps too. I finally found mine at a jewelry supplies store on Queen St W, pack of 8 for $3
  4. Circle Attachers – set of 100 for $2

Instructions

  1. Measure rope by wrapping it once around your wrist. Repeat with another piece of rope (so you have 2 in total)
  2. Take one of the pieces of rope and bend it in half to create a loop. Place the crimping bead over the loose rope ends, press the crimping bead shut. The ends should join together and the anchor should be attached.
  3. Loop the second piece of rope and wrap it under and through the first piece of rope’s loop. Visit A Blissful Dream’s version for a visual reference!
  4. Once the two pieces of rope are looped together, secure the loose ends of the second rope with another metal crimping bead,  press the crimping bead shut. This is where your anchor will hook.
  5. Attach your anchor and set sail

SO nautical.